Sunday, April 24, 2016

DIY Butterfly Kiss Miniature Living room set


Yes, I have another DIY miniature kit!
This one I received as a birthday gift but can be purchased off Amazon.  

I'm not completely finished yet but I was excited to show what I have so far.  
It's very cute, but quality is not the same as the previous miniature I did.  It's much cheaper in price and quality but still fun nevertheless.  It was definitely a challenge and quite a bit more difficult compared to the previous kit.  Instructions come in both Chinese and poorly written English.  The poor translation made it a bit more difficult but there were also a lot of very small intricate parts and pieces that took much more patience and persistence. 
This kit kept me occupied for many more hours than my Japanese thatched tea house kit. I would estimate it took me around 20 hours of slowly working on this over many months.

Box and packaging:
Pen for scale:


Near complete project.  It's still missing few small pieces, plastic enclosure and lighting:  (click to enlarge)
As you can see, lots of tiny details.  Pillows are hand sewn.  Each book is made by cutting out a printout and folding it into a book form.  Some of the flowers are hand made or hand cut.

Furniture is assembled by glueing boards together.  The sofa is put together out of multiple boards, felt cushions, cloth and little attachable furniture feet.
It actually comes with electric lights that come with wiring and battery pack so it can actually light up!

There is also an enclosure behind the tall bookcase that can house a musical box.  There are holes in the back wall to allow for the wind-up mechanism.

Back:  Showing the music box wind-up mechanism and battery pack.


The finished project:
BTW, you can see that I did a TERRIBLE job with the plastic enclosure.  This was my first go around with something like this and now I know to avoid touching the plastic at all costs! I left sticky glue fingerprints everywhere! It looks worse now than before the plastic enclosing was placed.  But alas, it is now a completed project and I can say I have conquered this miniature kit! :P


Saturday, April 23, 2016

Simple Rhinestones & Nail Art


I recently came across some really cheap nail art rhinestones so I thought I'd give them a try.
This turned out to be surprisingly easy and didn't require much technical expertise at all.  


I don't have much in terms of nail art tools and found that for a simple design you really don't need anything other than your fingers.  I had a pair of tweezers but didn't feel they were necessary. 

I purchased the rhinestones online at AliExpress.  I don't actually recommend this web site as there is a very long delivery time (weeks to months) and there have been some very shady sellers that I've already crossed paths with.

Necessary materials:
- Rhinestones
- Top coat
Optional materials:
- Colored nail polish
- Base coat

I've also seen rhinestones available for purchase at my local Daiso (Japanese $1.50 store) or Dollar Tree.  This gorgeous Maybelline NY Color Show polish in the color Alluring Rose was found at my local Dollar Tree.  Goes to show that at home manicures don't need to be expensive! 

Directions:
Apply as many coats of the colored nail polish as you desire (or just a clear coat if you don't want color).  Immediately after painting the last coat, carefully place the rhinestone.  I simply placed the rhinestone right side up, then used my finger pad to pick it up and place it on my nail.  You have a few seconds to adjust the rhinestone to your liking.  Then apply 2 thick layers of top coat over the rhinestones. 

Note: I initially tried with just 1 layer of top coat but found that they quickly fell off with my daily activities.  Two layers of top coat have kept my rhinestones on through days of normal use.

Monday, March 28, 2016

Japanese DIY Thatched Tea House Miniature Kit

Remember my last post about the DIY miniature house kits from Japan?

Well, I can now say I have successfully and quite triumphantly completed one! What do you think?

Full View:

Close up view -- look at the details!!
Overhead view -- yes, even the inside of the house is decorated.


How did I do?

I wish I had taken a before shot of how this package came.  It's in a big bag full of particles of wood, paper, rocks, etc.  You literally put all the pieces together to assemble the roof, house, wheel, etc.  I thought this was a lot of fun.  Instructions are in Japanese only but they have photos which helps.  Most items are given a letter name and dimension (ie: A is 12cm x 1cm x 1cm) so you can deduce what is what from that.  I did watch a few youtube tutorials of similar projects which helped me out a lot.  If you're having trouble I definitely recommend watching a few videos.

Now even if you don't live in Japan, thanks to the wonders of the internet this product is available for purchase on Amazon.  There are many other models too, some of my favorites are...


Happy Crafting everyone! 

Wednesday, November 18, 2015

Miniature craft kits from Japan

I came across these miniature diy craft kits in Japan and was just floored at the detail.   They had all kinds of different sceneries, traditional and modern store fronts, etc. 


Here is a close up photo of one of the kits.


I definitely had to grab a kit. Instructions are all in Japanese and I hope that won't pose too much of a problem because I cannot wait to get working on this!

Wednesday, October 21, 2015

Adorable Minnie and Mickey purses

Came across these *adorable* Minnie and Mickey purses.  They were so darling!  Unfortunately, they are too small to be practical so I did not buy them, but now I can't stop thinking about how I could maybe DIY something to this effect.  Or is there something like this already out there?  They were just so cute I had to share!

Friday, October 16, 2015

DIY bath bombs

Tired of paying for overpriced bath bombs from retailers?
Try out these nifty DIY bath bombs!

Chubby hearts with rose petals:
Halloween inspired spider bombs:


Recipe is as below:

2 Parts Baking Soda
1 Part Powdered Citric Acid
1 Part Corn Starch
1 Part Epsom Salt

Note: If you can't find citric acid you can substitute with Cream of tatar but the bath bomb won't be fizzy as a result.  I happened to find my citric acid at a local Indian grocery store but you can find it on many sites online.

In addition you will need some sort of mold to form a shape (ice cube tray would work too), a spray bottle, mixing bowl, etc.

Mix all your dry ingredients together.  

Then the liquid portion is a bit more flexible.  You can use water, food coloring, witch hazel, melted coconut oil with some essential oils etc and using a spray bottle.  You won't need much at all.  Spray ONLY enough to get the mixture damp enough to hold a form.  As in when you pinch it, it holds the pinched shape.  If you spray too much you will prematurely activate the fizzling and then your bath bomb won't fizz when you use it.   This is especially important and I didn't notice this emphasized enough on the majority of the bath bomb recipes out there.  If you notice your mixture fizzing then you've sprayed too much water.  You can still put it in the molds (though they might continue to fizz and bubble out) and they will still work otherwise just without the fizzing.

Happy bath time everyone!

Wednesday, October 14, 2015

DIY eos deodorant.... flop

Have you all seen all those new DIY eos hacks lately? Pretty nifty huh?

One that recently caught my eye was the DIY eos deodorant.  I thought it'd be great to travel with since it would be in such a small container and the best part is that I found a recipe that only needs 3 ingredients that I already had. 

So the recipe I used calls for coconut oil, corn starch and baking soda.  Mix it up (2 parts coconut oil to 1 part corn starch and 1 part baking soda), pour it into your disassembled eos container, and pop it in the fridge and done!  It looked great when I took it out, however.... Don't ever take this out of the fridge!!!

Ok, now let me explain why I do NOT recommend this DIY.  Unless you live in a cold enough climate that the coconut oil is ALWAYS a solid I would NOT recommend having this item stored anywhere outside the refrigerator.  Given that it's a balmy 70 degrees Fahrenheit where I am, it didn't take long for the coconut oil to melt and leak out of my eos container creating a mess.  Good thing I hadn't packed this for my vacation just yet!  I popped it back in the fridge and this is what I have remaining, covered in a messy residue:  


No photos of the actual melted mess were taken due to the messy messy nature of it.

Really great concept, however, the coconut oil recipe just won't fly for a travel friendly product as temperatures are always in flux.  If you just want it to have around the house then it'd be great.  

I'm thinking it would have probably been an awesome DIY if beeswax was used instead of the coconut oil.  Maybe next time..... 

Daiso Felt Sweets Kit

The latest kit I finished was this cute Strawberry Swiss roll plush.  The strawberry and whip cream dollop are definitely my favorite parts of this project.  I was expecting this to be a pretty quick and easy project but this took me a bit more time than I had anticipated.  The packaging actually estimates this to take 2-2.5 hours, it took me approximately 3+ hours but I did mess up halfway through when I glued the swirl piece on backwards :P Silly me, but I do think the results are well worth it! How do you think I did?

Sunday, October 11, 2015

Daiso Halloween Crafts

Anyone else loving these Daiso Halloween felting kits? I think they're adorable! The opened packaging on the right is a pumpkin with a witch hat. Can't wait to get these little guys finished :)


I don't know about you guys, but Halloween is definitely my favorite holiday of the year.

Tuesday, October 6, 2015

Hello Kitty Apple 5c phone case


So I just bought this *adorable* phone case off eBay. I wasn't so sure how it would work and didn't find any info online so I figured I'd put this up in case anyone is interested.

I purchased mine in The color "Rose" (which I suspect is the top second in the stock photo above) and am using it with my pink iPhone 5c.  As you can see, this doesn't really match with the colors of the stock photo. If you look around you'll see varying shades depending on the vendor and stock photo used. 


I ordered mine hoping to match it closest with the color of my pink iPhone 5c. It's not a perfect match but I think it's pretty close.
The first question I had was about whether the buttons would work well giving the chunkier edges of the case. I can say it definitely works very well. No need to push hard.


There's also easy access to the headphone and charging ports. 


I also tried this with an iPhone 5S and it fits great and all the buttons work just as well. 

Now in regards to phone protection I probably would not want to drop your phone too many times in this (or any other case for that matter). The chunky nature of the case I think helps with buffering any damage. My only concern is that the case is not exactly snug tight on the phone.  But I have tried shaking it in my bag and dropping it on my bed and no issues with the case coming off. 

Definitely would recommend especially considering this cost me under 10$. It is *super* adorable and I really have no complaints.  Mine also came with a screen protector and waterproof ziplock case which I thought was quite thoughtful. Shipping did take about two weeks since it came from overseas. 

Overall, very please and definitely no regrets!

Update:  After having used this case for about a month I definitely have to report that the phone DOES slip out the edges of he case quite easily. Sometimes I will pull it out of my purse with a corner of my phone out of the case. It can also shift so that the case covers the lower portion of the back camera and blocking the view very slightly. It also has this very artificial smell that I've tried to wash out a few times. The smell has improved but is still present even a month later.

Given that the phone slips out of the shell I definitely wouldn't consider this the most protective case out there. However I'm still using it because it is stinking cute.  


A little craft here, a little craft there

So I haven't been knit or crochet much lately but I've been dabbling in many other little crafty adventures. I've gotten semi-decent at nail art, made a tiny woven halloween pumpkin, was recently introduced to the world of felting... and then I discovered polymer craft figurines. I am smitten by how cute these things can be. I've taken up some needle felting and have a few of my projects down below.

 Little Felted bunny

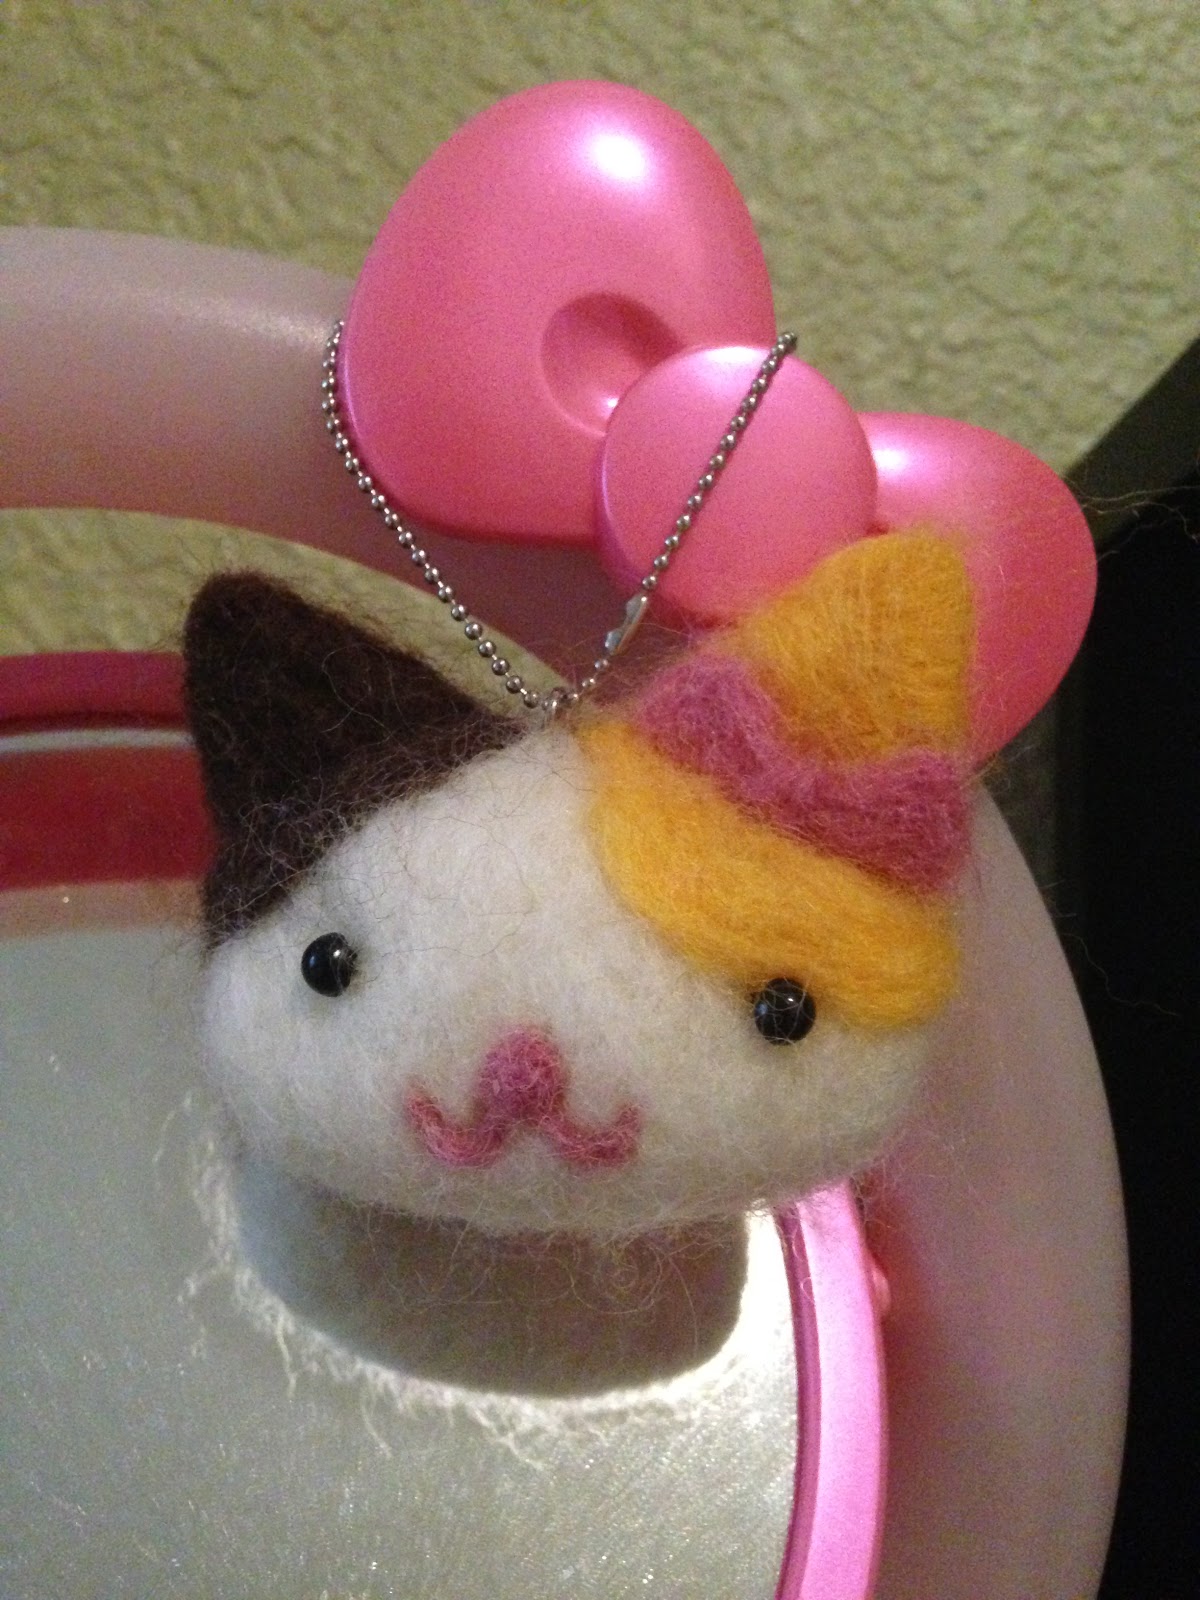
  Felted Kitty

 
Hand woven Witch Pumpkin basket, couldn't help but attach a picture of my ever so unamused cat, hehe

 Note that all of the above projects were made from kits bought from my local Daiso store (which just so happens to be one of my favorite stores now!)

Thursday, October 21, 2010

Boy has it been a while.

It's certainly been busy.

Remember that beaded shrug I last posted? I finally finished it.
Beaded shrug
[Apologize for the crummy picture quality. I'm dependent on my laptop webcam for any pictures these days.]

I also started and completed a single knee-high sock... haha. This first one took me multiple tries to get the right diameter down, but the second one should go by much quicker (i hope!)
Knee-high leyburns Knee-high leyburns close

Wednesday, January 27, 2010

When I was in 4th grade...

I was the only kid in my class that wanted to be a housewife. All the other kids wanted to be the president, or a firefighter, etc but not me! And then I went to school for too many years of my life and accrued to many thousands of dollars of debt and now have to work a real job to pay off all those debts....

Anyhow, my point was: I don't have nearly enough time as I wish I did to work on these projects!!

Beaded Pullover: I made a lot of progress in a few days. It's been more than half done for some time but the beading process was a little more than I was expecting! And I've had some trouble trying not to dye my yarn with bead residue while pulling them through.


Rainy Day Gloves: Knitting complete and buttons bought! Just need to weave in all the little ends.


Can't wait to start my Mrs.Darcy pullover with this cute cranberry colored yarn I bought! :)

Saturday, December 26, 2009

Holiday Traveling!

Been spending the last few days in San Diego, where it's brilliantly sunny and almost hot during the day but ever so chilly at night. Why must ocean-side cities always be like that? I'll be traveling up north to San Francisco in a couple days where it'll be the same deal again. I might try to hit up a wholesale yarn shop I've heard of around there....

Since I'm traveling, I'm limited to a few things to work on (which actually results in better productivity, haha!). I've been making good progress on a the pullover that I started just yesterday. I managed to walk to the harbor today and knit by the shore for a little while too. So many cute dogs were out today! Makes me want one :3

In a few days, when I get up to SanFran I'll get my dad's old Olympus SLR camera which I'm super excited for! I'll make sure to take put it to use and grab some nice pictures of christmas goodies and so on so forth. :)

Sunday, December 20, 2009

Ready for retirement...


I'm so ahead of schedule when it comes to getting ready for retirement!

I've started cross-stitching "The Perfect Patio". I don't know why I decided to pick this gigantic 10"x14" pattern as my first. It seems easy but boy is it easy to get lost in the pattern too.

I'm pretty sure I've already messed up a little bit. Haha. Well, we'll see where this goes!

Oh, I've also finished my second larger sized penguin shirt, and finished most of one Rainy Day glove - pictures to come soon! :)

Tuesday, December 8, 2009

penguin shirt!

I'm a novice at sewing if anything, but here is my attempt at a penguin shirt :)

Made from two plain T-shirts, one black and one white. Cut out the fronts of both shirts and dyed the white front Sewed it onto the rest of the black shirt but gave it baseball styled sleeves to add to the penguin effect. The dye job could have been a lot better but hey, penguins aren't perfect either!

Given that this was actually a practice run I'm pretty excited about how well it turned out :)

Marlenes!


I just finished my first pair of socks! I don't know why I picked an advanced pattern when I've never made socks before, but It turned out pretty well! Although I wish I wasn't so silly and used fingering sock yarn instead. That way I could actually wear them with shoes and not just as slipper socks at home. But this way they also keep me quite warm in this frigid weather!

Hurray for warm toesies!

Saturday, December 5, 2009

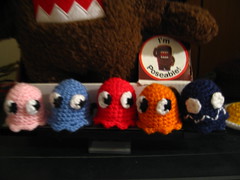
Pacman Inspired Ghosties


These little guys have the perfect little squiggly feet. These ghosties are small and like to float around.  Mine came out to be about 2 inches tall and a inch and a half wide. 

You will need yarn of white, black and whichever color ghostie you would like.  I used some leftover Red Heart yarn.  

Eyes can be glued or sewed on.

You will need an embroidery needle if you want to add a mouth.    

Ghostie body:
R1 - chain 6 in magic ring
R2 - 2 sc in each (12)
R3 - Sc1, 2sc in next st repeat 6 times (18)
R4 - Sc 2, 2sc in next st repeat 6 times (24)
R5-  Sc in all 24 st 
R6-11 repeat R5

crochet in the front loop only for the legs:
sc in first half loop, (sc, hdc, sc) in next, sc repeat this 8x

R12 in back loop of same row as legs- Sc 2, dec 1, repeat 6 times (18 sts)
R13- Sc 1, dec 1, repeat 6 times (12 sts)
Stuff firmly
R24- Sk 1 st, sc 1, repeat 6 times (6 sts)
Bind off, weave in loose end.


This is what the completed ghost should look like


Eyes were made by making a magic circle with black and then switch to white yarn and make 2 sc into the first 3 stitches.  Sew or glue onto body.

Hope you enjoyed the pattern!
Craftblog!